> ## Documentation Index
> Fetch the complete documentation index at: https://docs.cloudcapital.co/llms.txt
> Use this file to discover all available pages before exploring further.
# MCP server
> Connect AI tools like Cursor, Claude Desktop, and Windsurf to your Cloud Capital data using the Model Context Protocol.
The Model Context Protocol (MCP) is an open standard that lets AI assistants connect to external data sources. Cloud Capital provides an MCP server that gives your AI tools direct access to your cloud cost data, forecasts, initiatives, and more — the same capabilities available in the [in-app chat assistant](/ai/chat-assistant).
## Server URL
```
https://app.cloudcapital.co/api/v1/mcp/server
```
## Setting up in Cursor
Open Cursor Settings and navigate to the MCP server configuration section.
Add a new server with this configuration:
```json theme={null}
{
"mcpServers": {
"cloudcapital": {
"url": "https://app.cloudcapital.co/api/v1/mcp/server"
}
}
}
```
Cursor opens a browser window for authorization. Sign in to Cloud Capital (if not already signed in), select the organization you want to authorize access for, and click **Authorize**.
Switch back to Cursor — the connection is now active.
## Setting up in Windsurf
Windsurf uses the same configuration format as Cursor. Follow the Cursor steps above, entering the same server URL and JSON configuration in Windsurf's MCP settings. The authorization flow is identical.
## Setting up in Claude Desktop
Claude Desktop's local config file only supports STDIO-based MCP servers — it cannot connect directly to remote HTTP servers. To connect to Cloud Capital's MCP server, use the `mcp-remote` bridge, which runs locally and handles the OAuth flow on your behalf.
You will need [Node.js](https://nodejs.org) installed on your machine for the `npx` command to work.
Claude Desktop reads MCP server settings from a JSON config file on your machine. Open it in any text editor:
* **macOS:** `~/Library/Application Support/Claude/claude_desktop_config.json`
* **Windows:** `%APPDATA%\Claude\claude_desktop_config.json`
If the file does not exist, create it.
Add the following to your config file. If `mcpServers` already exists, add the `cloudcapital` entry inside it:
```json theme={null}
{
"mcpServers": {
"cloudcapital": {
"command": "npx",
"args": ["mcp-remote", "https://app.cloudcapital.co/api/v1/mcp/server"]
}
}
}
```
`mcp-remote` acts as a local bridge between Claude Desktop and the Cloud Capital HTTP server. It handles the OAuth authorization flow automatically.
Quit and relaunch Claude Desktop to load the new configuration.
When Claude Desktop first connects, `mcp-remote` opens a browser window for authorization. Sign in to Cloud Capital (if not already signed in), select the organization you want to authorize access for, and click **Authorize**. The token is cached locally — you will not need to re-authorize on subsequent launches.
## API key authentication
By default, MCP clients use OAuth — a browser window opens for sign-in and the token is cached locally. Some clients do not persist this token between sessions, requiring you to re-authorize each time. Using an API key instead bypasses the OAuth flow entirely, giving you persistent access without re-authentication on restart.
### Create an API key
1. In the Cloud Capital app, click your organization name at the bottom of the sidebar to open **Organization Settings**.
2. Navigate to the **Developers** tab.
3. Under **API Keys**, click **Create API Key**, give it a name, and copy the key — it is only shown once.
### Configure your client with an API key
**Cursor and Windsurf**
Replace the standard URL-only configuration with:
```json theme={null}
{
"mcpServers": {
"cloudcapital": {
"url": "https://app.cloudcapital.co/api/v1/mcp/server",
"headers": {
"Authorization": "Bearer YOUR_API_KEY"
}
}
}
}
```
**Claude Desktop**
Pass the key as a header through `mcp-remote`. Using an environment variable keeps the key out of the config file itself:
```json theme={null}
{
"mcpServers": {
"cloudcapital": {
"command": "npx",
"args": [
"mcp-remote",
"https://app.cloudcapital.co/api/v1/mcp/server",
"--header",
"Authorization:${API_KEY}"
],
"env": {
"API_KEY": "Bearer YOUR_API_KEY"
}
}
}
}
```
Replace `YOUR_API_KEY` with the key you copied from the Developers tab.
***
## Authorization and security
When an MCP client connects for the first time, it opens a browser window with the Cloud Capital **Authorize Access** screen. From here you select the organization you want to grant access to and review the permissions being requested.
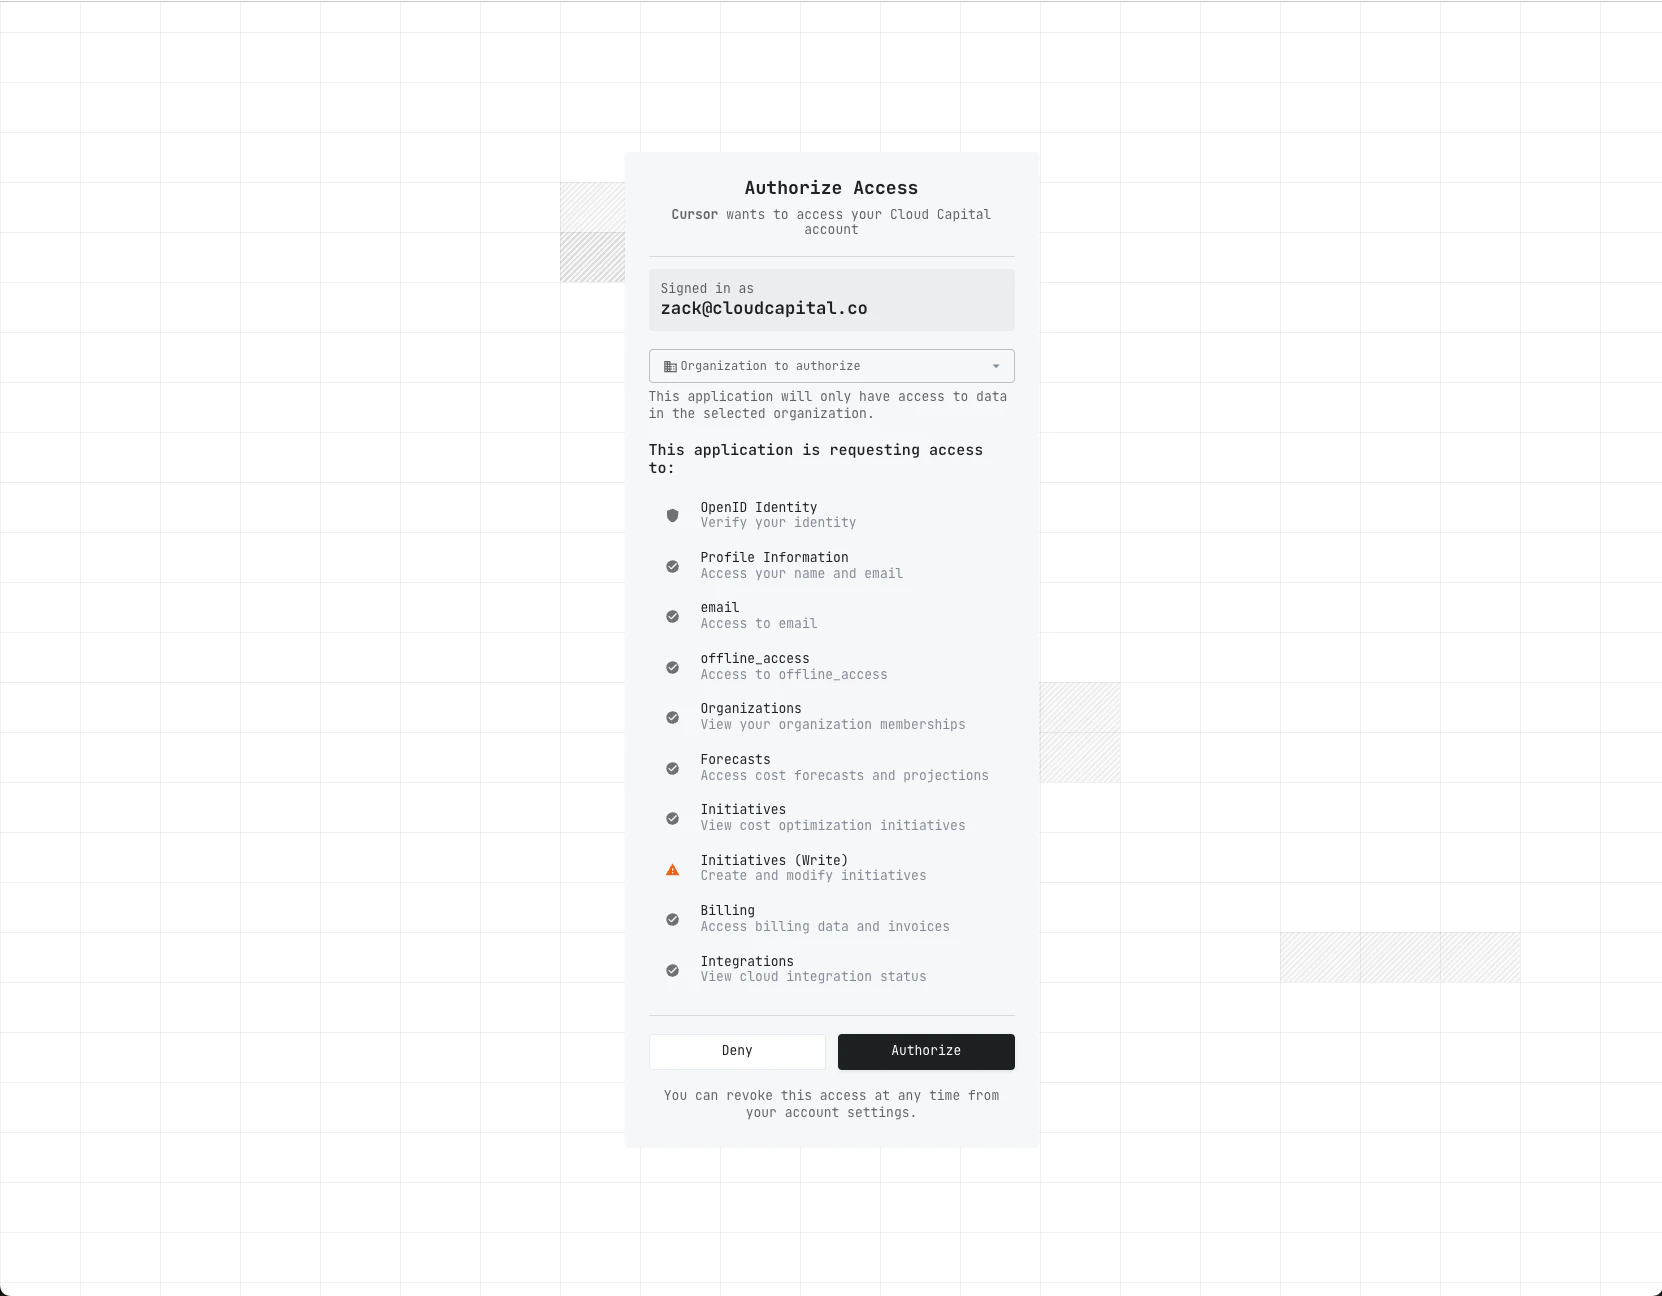 * The client only has access to the organization you selected during the consent step.
* You are shown the exact permissions being granted before you authorize.
* Click **Authorize** to complete the connection, or **Deny** to cancel.
* Authorization uses industry-standard OAuth 2.1 with PKCE.
## Managing connected applications
In the Cloud Capital app, click your organization name at the bottom of the sidebar.
Select the **Developers** tab. Under **Cloud Capital MCP Server**, you will see all connected applications.
From this screen you can:
* **Revoke Token** — invalidates a specific access token. The app can reconnect without re-authorizing.
* **Disconnect App** — fully removes the app and all its tokens. The app will need to go through the authorization process again.
## Available tools
The MCP server provides the same tools as the in-app [chat assistant](/ai/chat-assistant): cost queries, forecasts, initiatives, billing, business metrics, and more. You can ask your AI tool to list available capabilities at any time.
## Troubleshooting
| Issue | Solution |
| ------------------------------------------------------- | --------------------------------------------------------------------------------------------------------------------------------------------------------- |
| Tool can't connect | Verify the correct URL is configured: `https://app.cloudcapital.co/api/v1/mcp/server` |
| Authorization fails | Confirm your account is a member of at least one Cloud Capital organization |
| Need to switch organizations | Disconnect the app from the Developers tab and re-authorize with the new organization selected |
| Claude Desktop — invalid configuration error | Claude Desktop does not support `"type": "http"` in its local config. Use the `mcp-remote` approach described above instead |
| Claude Desktop — `npx` not found | Node.js is required. Install it from [nodejs.org](https://nodejs.org) and restart Claude Desktop |
| Claude Desktop — browser doesn't open for authorization | Run `npx mcp-remote https://app.cloudcapital.co/api/v1/mcp/server` directly in a terminal to trigger the OAuth flow manually, then restart Claude Desktop |
| Re-prompted to sign in on every restart | Use API key authentication instead of OAuth — create a key in Organization Settings → Developers and configure it as a header (see above) |
* The client only has access to the organization you selected during the consent step.
* You are shown the exact permissions being granted before you authorize.
* Click **Authorize** to complete the connection, or **Deny** to cancel.
* Authorization uses industry-standard OAuth 2.1 with PKCE.
## Managing connected applications
In the Cloud Capital app, click your organization name at the bottom of the sidebar.
Select the **Developers** tab. Under **Cloud Capital MCP Server**, you will see all connected applications.
From this screen you can:
* **Revoke Token** — invalidates a specific access token. The app can reconnect without re-authorizing.
* **Disconnect App** — fully removes the app and all its tokens. The app will need to go through the authorization process again.
## Available tools
The MCP server provides the same tools as the in-app [chat assistant](/ai/chat-assistant): cost queries, forecasts, initiatives, billing, business metrics, and more. You can ask your AI tool to list available capabilities at any time.
## Troubleshooting
| Issue | Solution |
| ------------------------------------------------------- | --------------------------------------------------------------------------------------------------------------------------------------------------------- |
| Tool can't connect | Verify the correct URL is configured: `https://app.cloudcapital.co/api/v1/mcp/server` |
| Authorization fails | Confirm your account is a member of at least one Cloud Capital organization |
| Need to switch organizations | Disconnect the app from the Developers tab and re-authorize with the new organization selected |
| Claude Desktop — invalid configuration error | Claude Desktop does not support `"type": "http"` in its local config. Use the `mcp-remote` approach described above instead |
| Claude Desktop — `npx` not found | Node.js is required. Install it from [nodejs.org](https://nodejs.org) and restart Claude Desktop |
| Claude Desktop — browser doesn't open for authorization | Run `npx mcp-remote https://app.cloudcapital.co/api/v1/mcp/server` directly in a terminal to trigger the OAuth flow manually, then restart Claude Desktop |
| Re-prompted to sign in on every restart | Use API key authentication instead of OAuth — create a key in Organization Settings → Developers and configure it as a header (see above) |