> ## Documentation Index
> Fetch the complete documentation index at: https://docs.cloudcapital.co/llms.txt
> Use this file to discover all available pages before exploring further.
# Integrate AWS Data
Time to complete: \~10 minutes
The first step to using Cloud Capital is connecting your AWS cost data. Cloud Capital reads your AWS Cost and Usage Report (CUR) directly from an S3 bucket you control.
***
## Connect your AWS cost data
### What Cloud Capital accesses
The [Forecasting CloudFormation template](https://cloudcapital-integration.s3.us-east-1.amazonaws.com/aws/aws-cloudformation-forecasting.json) creates a read-only IAM role. Cloud Capital uses this role to:
| Purpose | AWS Services Used |
| -------------------------------------------------------------------- | ----------------------------------------------------------------------------------------------- |
| Read your Cost and Usage Report from S3 | `s3:GetObject`, `s3:ListBucket` — scoped to your specific CUR bucket only |
| Look up current AWS pricing for Savings Plans and Reserved Instances | `pricing:GetProducts`, `savingsplans:Describe*` |
| Discover commitment offerings available in your account | `rds:Describe*`, `elasticache:Describe*`, `redshift:Describe*`, `es:Describe*`, `ec2:Describe*` |
| Enumerate accounts in your AWS Organization | `organizations:List*`, `organizations:Describe*` |
| Read cost, billing, and utilization data | `ce:Get*`, `billing:Get*`, and related read-only billing APIs |
The Forecasting role is **strictly read-only**. No actions that create, modify, or delete any AWS resources are included. Cloud Capital cannot make any changes to your AWS environment through this role.
### Before you begin
**If you plan to enable AWS Billing Transfer**, your AWS account must use
fine-grained IAM billing permissions before the transfer can be enabled.
Accounts created before March 6, 2023 commonly have legacy `aws-portal:*`
policies that need to be updated first — and discovering this late delays
onboarding.
Check now while you're setting up the data integration:
If your account has legacy billing IAM actions, use the AWS Bulk Policy
Migrator (5–15 min) to update them before proceeding to Billing Transfer.
### Setup
From the main dashboard, navigate to **Cost Allocation** and click **Connect Cloud Provider**.
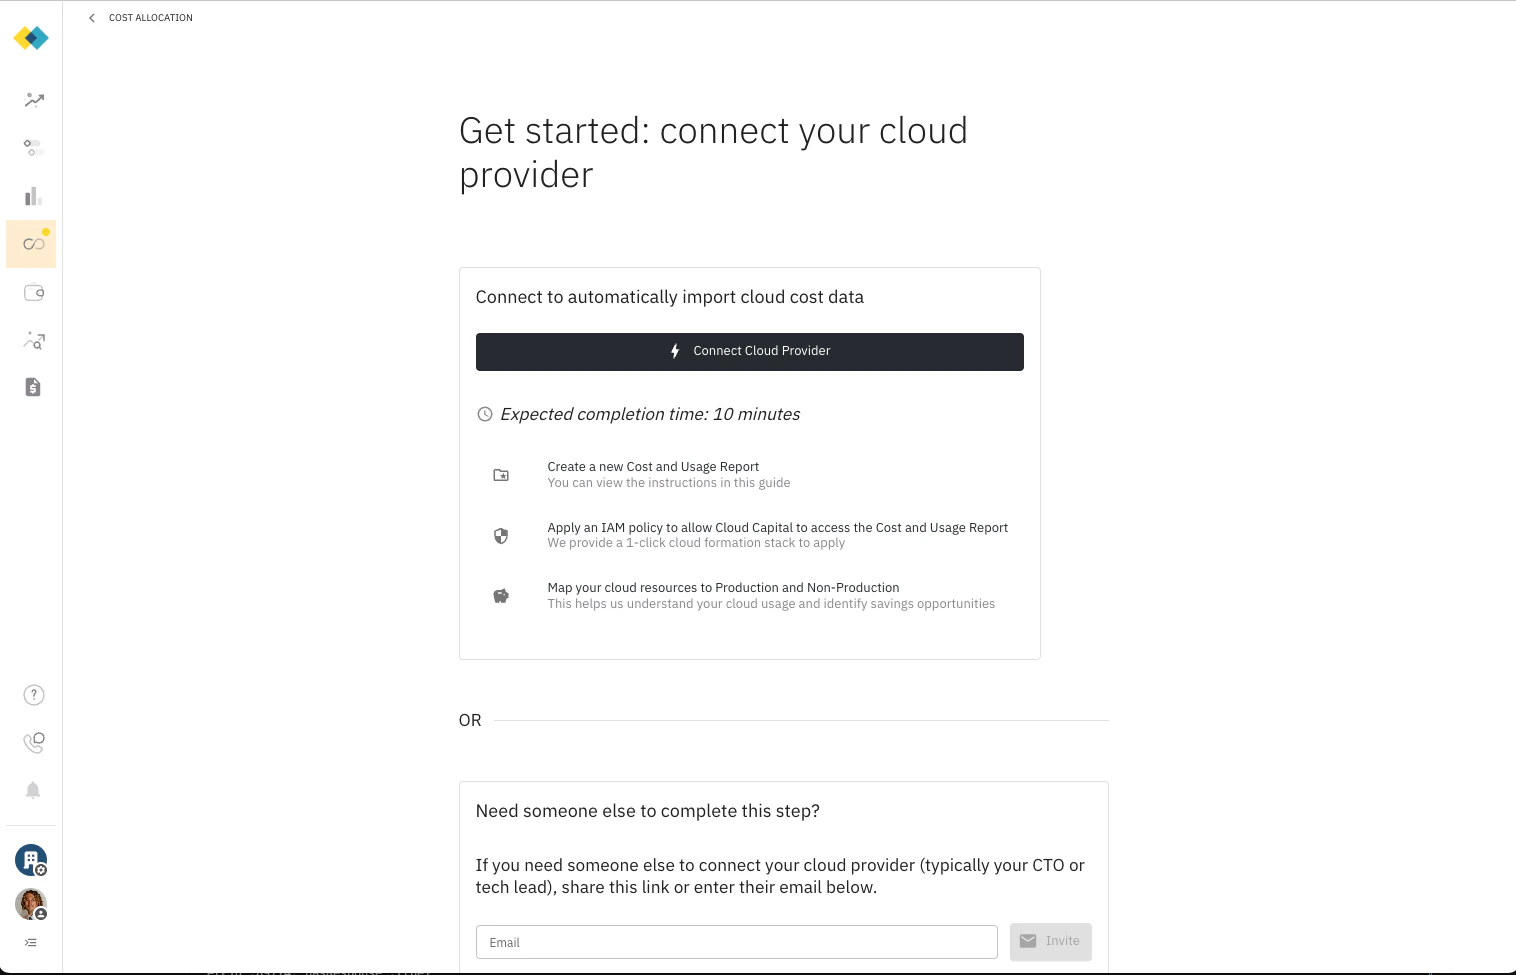 Then click **Create New Integration**, choose **AWS**, and give your integration a descriptive name (e.g., `AWS`).
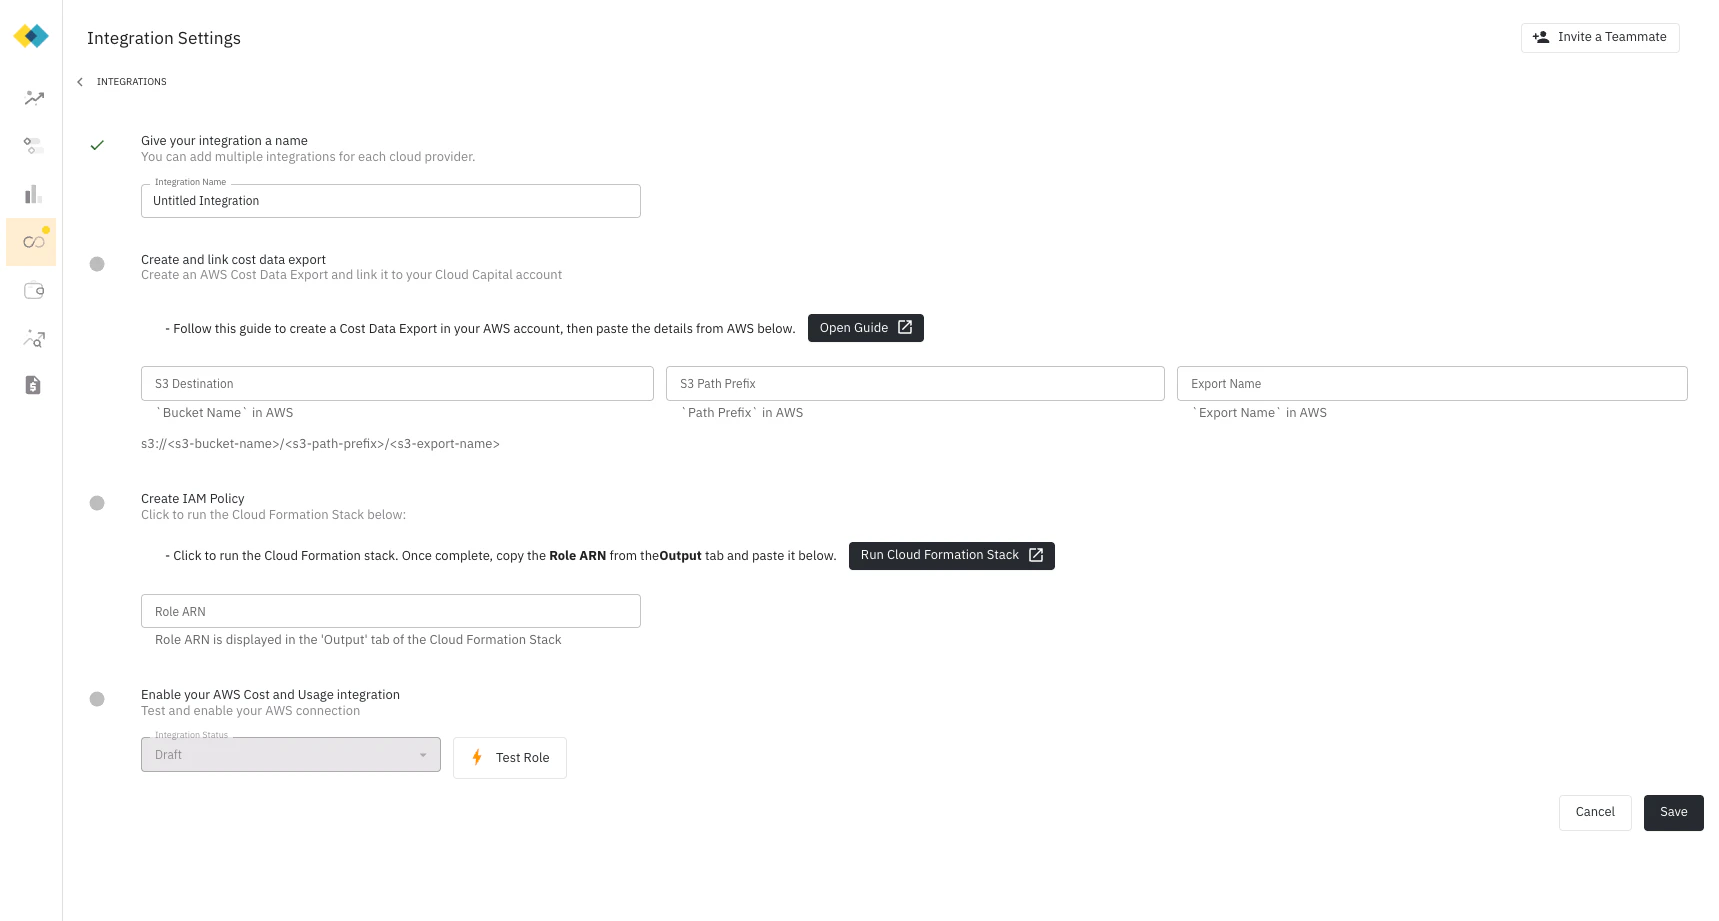 This step walks you through creating a cost data export in the AWS Billing and Cost Management portal.
If you already have a daily CUR 2.0 export running with the settings below, you can use the existing bucket and skip ahead to the next step.
1. In the AWS console, navigate to **Billing and Cost Management**
2. Click **Data Exports** on the left, then click **Create**
3. Select **Standard data export**
4. Give the report a name (e.g., `cloud-capital-cost-export`) — you will enter this name in Cloud Capital
In **Data table content settings**, configure:
* Format: **CUR 2.0** (default)
* Include resource IDs: **No** (leave unchecked)
* Split cost allocation data: **No** (leave unchecked)
* Time granularity: **Hourly**
* Column selection: keep the default
In **Data table delivery options**, configure:
* Compression type and file format: **Parquet - Parquet**
* File versioning: **Overwrite existing data export file**
In **Data export settings**, configure:
* Choose **Configure** → **Create a bucket** (recommended), or select an existing bucket
* Add an S3 path prefix of `hourly-export`
This step walks you through creating a cost data export in the AWS Billing and Cost Management portal.
If you already have a daily CUR 2.0 export running with the settings below, you can use the existing bucket and skip ahead to the next step.
1. In the AWS console, navigate to **Billing and Cost Management**
2. Click **Data Exports** on the left, then click **Create**
3. Select **Standard data export**
4. Give the report a name (e.g., `cloud-capital-cost-export`) — you will enter this name in Cloud Capital
In **Data table content settings**, configure:
* Format: **CUR 2.0** (default)
* Include resource IDs: **No** (leave unchecked)
* Split cost allocation data: **No** (leave unchecked)
* Time granularity: **Hourly**
* Column selection: keep the default
In **Data table delivery options**, configure:
* Compression type and file format: **Parquet - Parquet**
* File versioning: **Overwrite existing data export file**
In **Data export settings**, configure:
* Choose **Configure** → **Create a bucket** (recommended), or select an existing bucket
* Add an S3 path prefix of `hourly-export`
 You will need the S3 destination (bucket name + path prefix + export name) in the next step. It is shown directly after creating the report — copy and paste it.
Copy and paste the **Bucket Name**, **Path Prefix**, and **Export Name** from the previous step into the Integration settings in Cloud Capital.
Under **Create IAM Policy**, click **Run Cloud Formation Stack**. Cloud Capital pre-populates the required parameters in the stack — you do not need to enter them manually. This creates a read-only IAM role in your AWS Payer or Management account, scoped to your specific CUR bucket.
Once the stack completes, AWS provides a **Role ARN**. Enter this Role ARN in Cloud Capital.
You can review the full policy: [aws-cloudformation-forecasting.json](https://cloudcapital-integration.s3.us-east-1.amazonaws.com/aws/aws-cloudformation-forecasting.json)
Click **Test Role** to verify that Cloud Capital can access the bucket. If the connection is successful, your Integration status changes to **Enabled**. Save your integration to activate it.
You will need the S3 destination (bucket name + path prefix + export name) in the next step. It is shown directly after creating the report — copy and paste it.
Copy and paste the **Bucket Name**, **Path Prefix**, and **Export Name** from the previous step into the Integration settings in Cloud Capital.
Under **Create IAM Policy**, click **Run Cloud Formation Stack**. Cloud Capital pre-populates the required parameters in the stack — you do not need to enter them manually. This creates a read-only IAM role in your AWS Payer or Management account, scoped to your specific CUR bucket.
Once the stack completes, AWS provides a **Role ARN**. Enter this Role ARN in Cloud Capital.
You can review the full policy: [aws-cloudformation-forecasting.json](https://cloudcapital-integration.s3.us-east-1.amazonaws.com/aws/aws-cloudformation-forecasting.json)
Click **Test Role** to verify that Cloud Capital can access the bucket. If the connection is successful, your Integration status changes to **Enabled**. Save your integration to activate it.
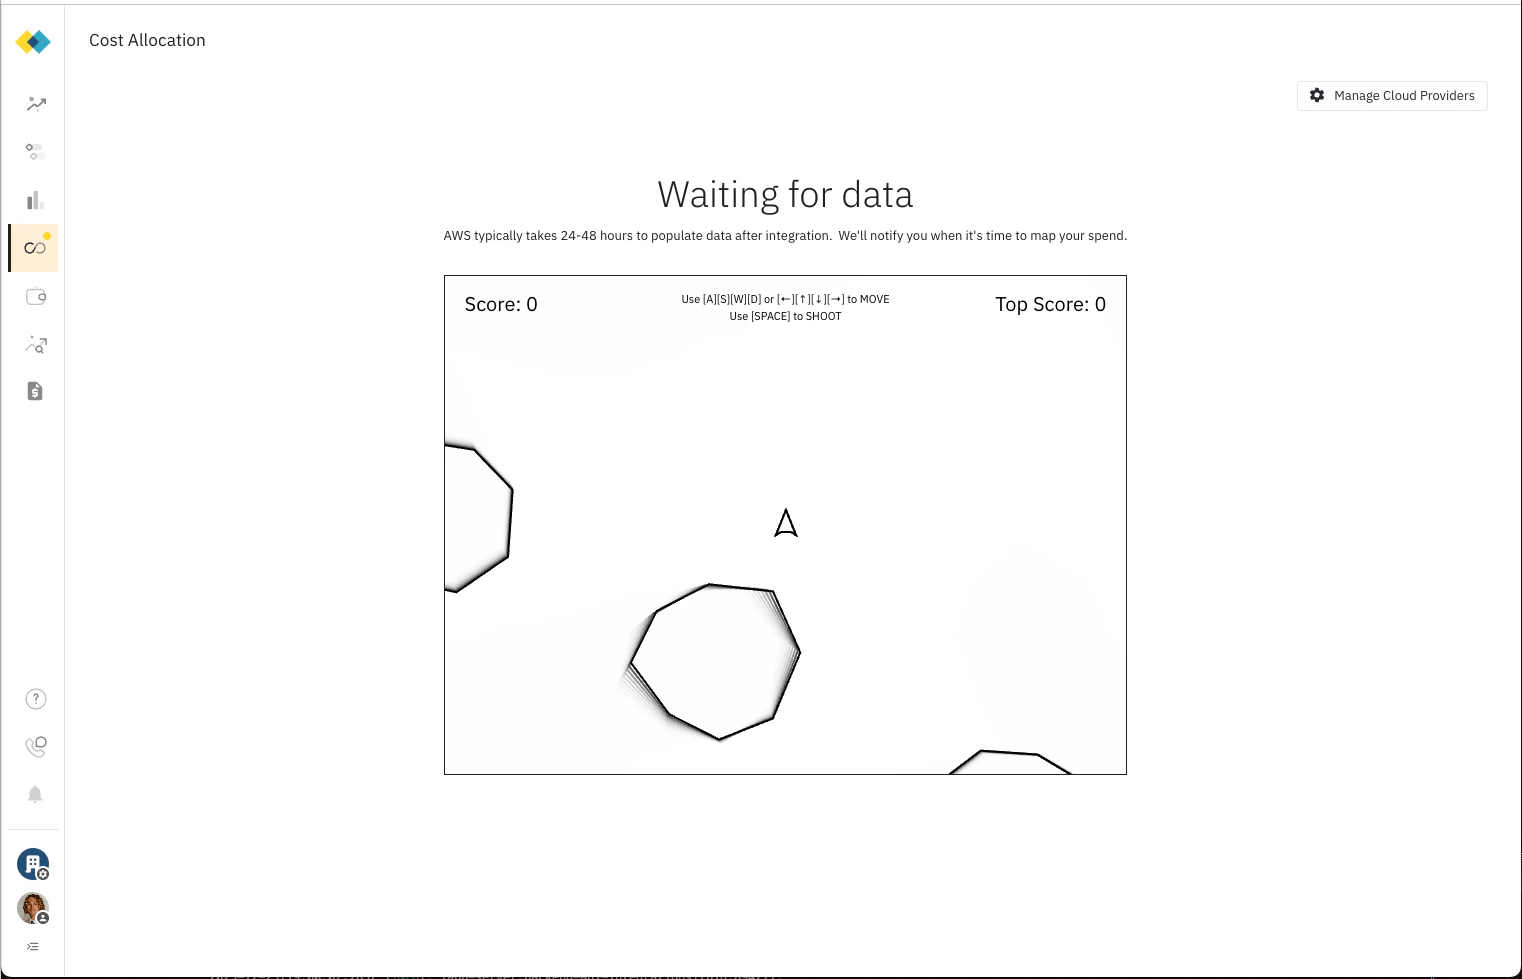 AWS typically takes 24–48 hours to populate the Cost and Usage Report for the first time. After 24 hours, return to the Integration settings to verify that data is being imported before proceeding.
***
If Cloud Capital will be managing AWS Savings Plans and Reserved Instances on your behalf, a second IAM role is required. See Commitment Purchasing Authorization for the full setup.
***
## How the cross-account role works
The Forecasting role uses AWS's standard cross-account access pattern with an **ExternalId** condition. Cloud Capital's AWS account ID and your unique ExternalId are embedded in the role's trust policy at setup time — meaning only Cloud Capital's specific AWS account can assume the role, and only when presenting the correct ExternalId. This prevents confused deputy attacks.
You can revoke the role at any time by deleting the CloudFormation stack in your AWS console, which immediately removes Cloud Capital's access.
This is a well-established AWS pattern for granting third-party access. For more detail on how cross-account roles and ExternalId conditions work, see [How to use an external ID when granting access to your AWS resources to a third party](https://docs.aws.amazon.com/IAM/latest/UserGuide/id_roles_create_for-user_externalid.html) in the AWS documentation.
***
## Security and access summary
| | Forecasting Role |
| --------------------------------- | ----------------------------------- |
| **Applied to** | Your management/payer account |
| **Read access** | CUR bucket and billing/pricing APIs |
| **Creates or modifies resources** | No |
| **Accesses workload accounts** | No |
| **Can be revoked** | Yes, instantly via CloudFormation |
For a full overview of how Cloud Capital handles data access, encryption, audit logging, and compliance, see the Security page.
AWS typically takes 24–48 hours to populate the Cost and Usage Report for the first time. After 24 hours, return to the Integration settings to verify that data is being imported before proceeding.
***
If Cloud Capital will be managing AWS Savings Plans and Reserved Instances on your behalf, a second IAM role is required. See Commitment Purchasing Authorization for the full setup.
***
## How the cross-account role works
The Forecasting role uses AWS's standard cross-account access pattern with an **ExternalId** condition. Cloud Capital's AWS account ID and your unique ExternalId are embedded in the role's trust policy at setup time — meaning only Cloud Capital's specific AWS account can assume the role, and only when presenting the correct ExternalId. This prevents confused deputy attacks.
You can revoke the role at any time by deleting the CloudFormation stack in your AWS console, which immediately removes Cloud Capital's access.
This is a well-established AWS pattern for granting third-party access. For more detail on how cross-account roles and ExternalId conditions work, see [How to use an external ID when granting access to your AWS resources to a third party](https://docs.aws.amazon.com/IAM/latest/UserGuide/id_roles_create_for-user_externalid.html) in the AWS documentation.
***
## Security and access summary
| | Forecasting Role |
| --------------------------------- | ----------------------------------- |
| **Applied to** | Your management/payer account |
| **Read access** | CUR bucket and billing/pricing APIs |
| **Creates or modifies resources** | No |
| **Accesses workload accounts** | No |
| **Can be revoked** | Yes, instantly via CloudFormation |
For a full overview of how Cloud Capital handles data access, encryption, audit logging, and compliance, see the Security page.