Default structure
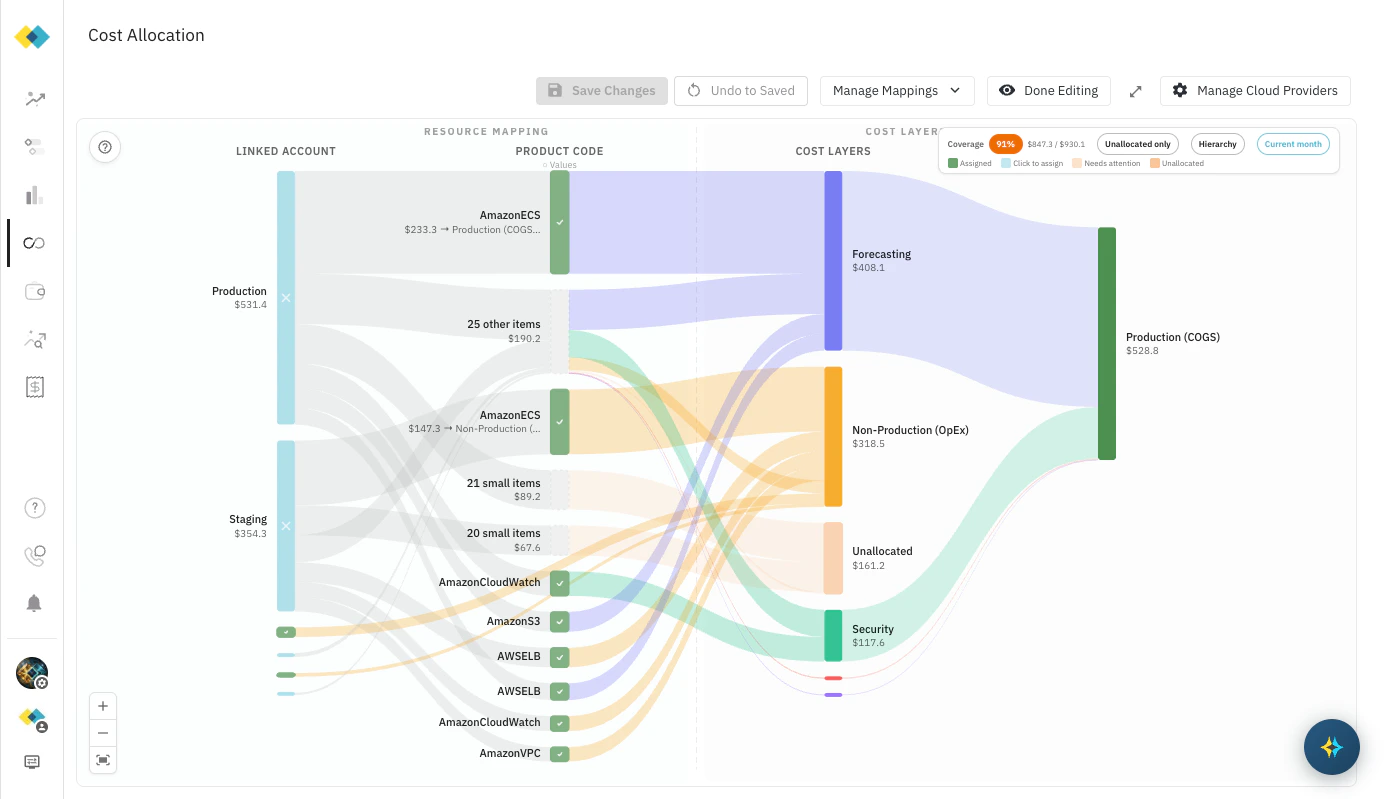
Cloud Capital starts every organisation with three top-level layers:- Production (COGS) — infrastructure that directly supports your live product or service. Cost of Goods Sold in financial terms: scales with revenue, belongs on the P&L as a direct cost of delivery.
- Non-Production (OpEx) — development, staging, testing, and internal tooling. Operating Expenditure: necessary business cost, but not directly tied to serving customers.
- Unallocated — spend that hasn’t been assigned to a layer yet. Your goal is to move all meaningful spend out of Unallocated and into the right layer. The Coverage % filter on the canvas shows your current allocation percentage — aim for 90%+ before building out your forecast.
Adding a sub-layer
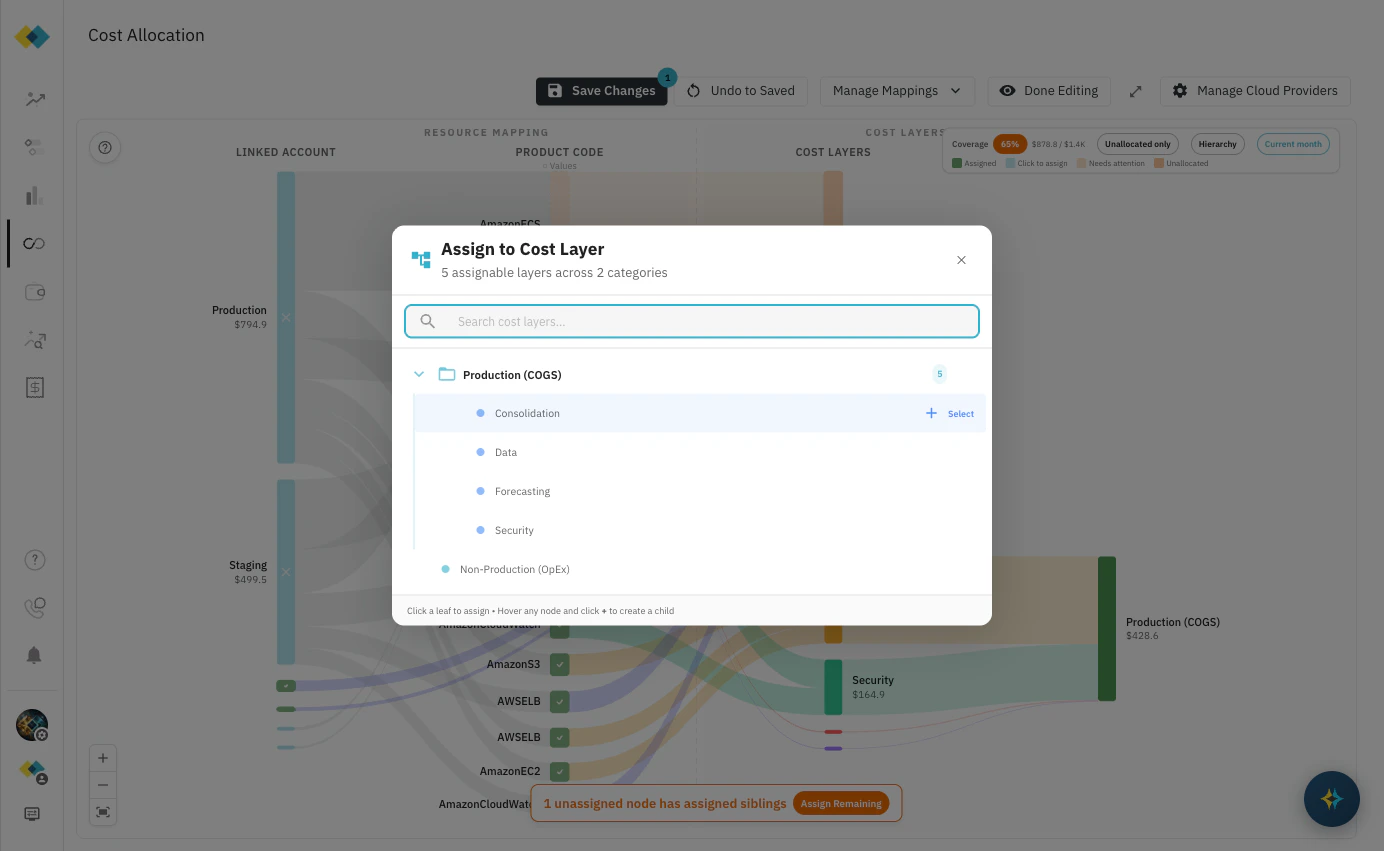
Sub-layers let you break down Production or Non-Production into meaningful categories — by product, team, AWS service family, region, or business line. The Forecast table reflects this structure directly, so adding a sub-layer immediately gives your finance team more granular visibility into where spend is going. To add a sub-layer:- Click any Product Code node on the canvas to open the Assign to Cost Layer picker.
- Hover over the layer you want to add a child under. A + button appears to the right of the layer name.
- Click +. An inline text input appears beneath the layer.
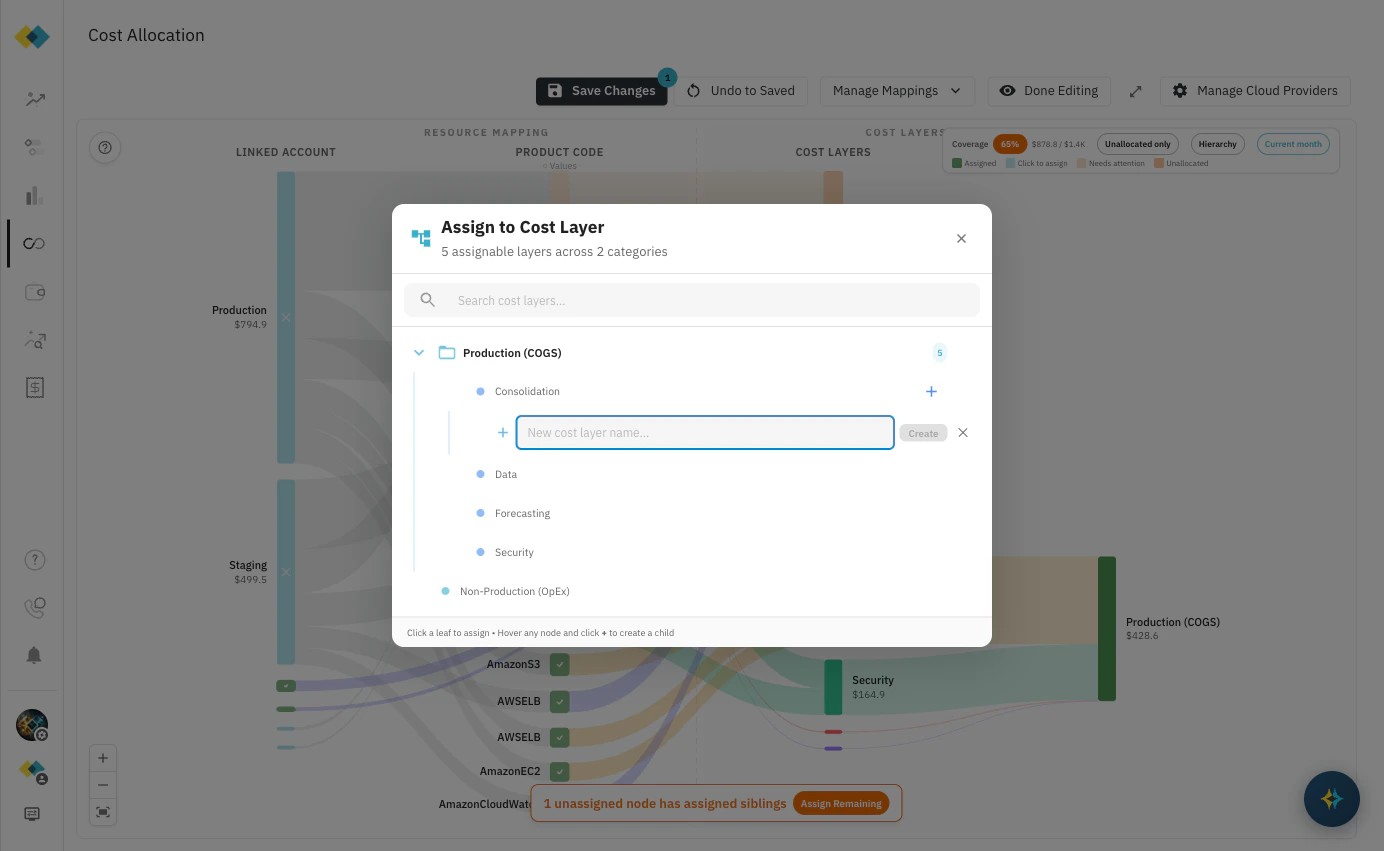
- Type a name and click Create (or press Enter). The new layer appears immediately in the tree.
- Click Save Changes in the toolbar to persist the new layer.
You can also add sub-layers during the initial guided setup flow — Step 2 offers a text input specifically for grouping production accounts into named sub-layers before applying the mapping.
Reassigning a service
Assignments can be changed at any time as your infrastructure evolves. A service that launched under one cost layer may belong under a different one after a re-architecture or ownership change. To reassign a service:- Click the Product Code node you want to reassign on the canvas.
- The Assign to Cost Layer picker opens showing the current assignment.
- Click the new destination layer in the tree. The flow in the canvas updates immediately.
- Click Save Changes to persist.
Understanding inheritance
Assignments flow down the hierarchy. When a Linked Account has been assigned to a cost layer, all Product Code nodes within that account inherit that assignment automatically — you don’t need to assign each service individually. This means:- Account-level assignment is the efficient path when all services in an account belong to the same layer.
- Product Code-level assignment overrides the account-level assignment for that specific service only. Use this when one account contains services that belong to different layers — for example, a shared services account where most spend is Non-Production but a specific RDS instance is production-grade.
When to update your structure
Cost layer structure should reflect how your business and your finance team think about cloud spend. Common reasons to revisit it:- New product line launched — add a sub-layer under Production to track that product’s infrastructure separately from day one.
- Team reorganisation — if engineering ownership has changed, update layer names and reassign services to match the new structure before the next forecast review.
- Infrastructure migrated — if a service that was Non-Production is now customer-facing, reassign it to Production (COGS). This affects your COGS/OpEx split and flows directly into the forecast and commitment sizing.
- Coverage below 90% — check the Unallocated only filter to find unassigned services and work them into the right layers.
Related pages
Cloud Resource Mapping
Initial setup: the guided flow, manual canvas, and toolbar reference.
Business Metrics
Connect growth data to your cost layers to drive forward-looking projections.
Projection Types
Set the forecasting methodology for each cost layer.
Engineering Initiatives
Model planned infrastructure changes before they hit the bill.