

How Initiatives Work
Each Initiative applies a set of cost adjustments (+/- changes) to one or more Billing Periods. Cloud Capital takes the baseline forecast for the affected mapping and applies the Initiative’s impact on top of it. The resulting changes are visible in the Forecast table, where Initiative-driven months show the adjusted projected spend.A single Initiative can affect multiple mappings and include both positive and negative cost impacts — useful for representing complex projects that increase spend in one area while reducing it in another.
Initiative Fields
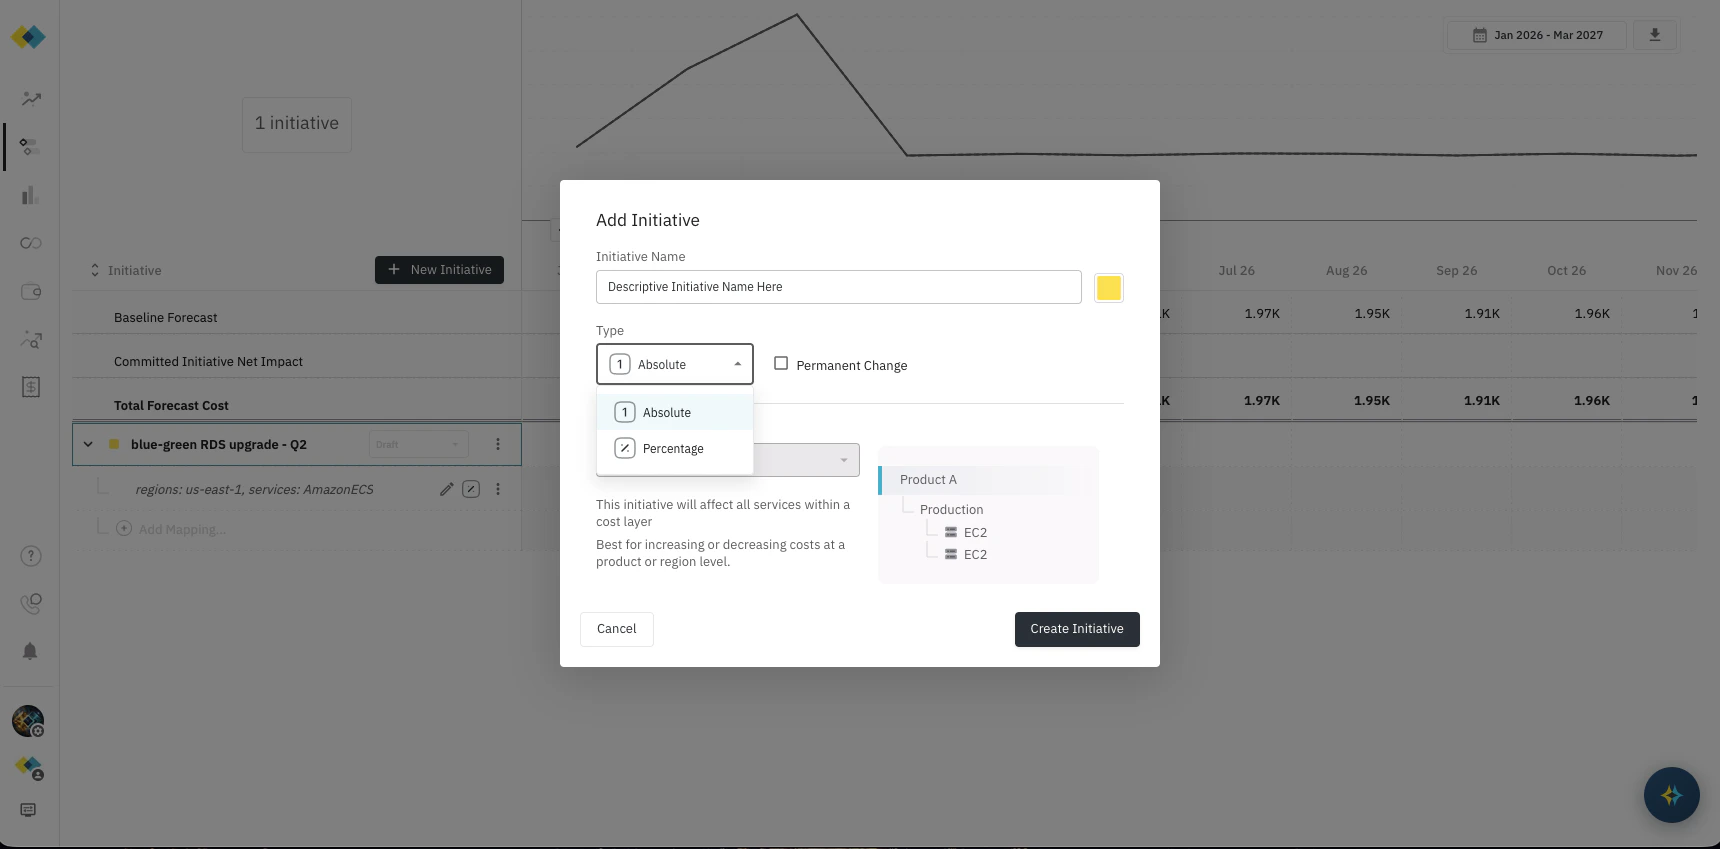
Name Give the Initiative a clear, descriptive name so that both your engineering and finance teams understand what it represents at a glance. Type Controls how the Initiative’s impact is expressed:- Absolute — a fixed dollar amount added or subtracted per Billing Period (e.g., −$5,000/month)
- Percentage — a percentage of the baseline forecast to add or subtract (e.g., −25%)
- Checked (Permanent) — the final month’s value repeats indefinitely. Use this for changes that permanently alter your infrastructure, such as completing a migration or decommissioning a service.
- Unchecked (Temporary) — effects are limited to the Initiative’s active months only, then the forecast returns to baseline. Use this for one-time events such as a launch spike or seasonal capacity increase.
- Draft — work in progress, not yet included in the forecast
- Committed — active and included in the forecast
- Completed — the Initiative has concluded; retained for historical reference
- Abandoned — no longer relevant, excluded from the forecast
Only Committed Initiatives impact the forecast. Draft, Completed, and Abandoned Initiatives do not affect forecast calculations.
Mappings: Targeting an Initiative’s Impact
Once an Initiative is created, you define what it affects by adding one or more Mappings. Click Add Mapping on any Initiative to choose the targeting type. Cloud Capital supports the following mapping types:
A single Initiative can have multiple Mappings — for example, a migration that reduces cost in one Cost Layer while increasing it in another.
Resource Mappings
Resource mappings allow you to scope an Initiative to specific cloud resources by their attributes, rather than an entire Cost Layer. This works the same way whether the underlying resources are on AWS or GCP — both appear in the same picker. Cloud Capital automatically calculates what fraction of spend matches your resource filter and applies the Initiative’s impact proportionally. This is especially useful for:- Infrastructure migrations — model the cost impact of moving off specific instance types or services
- Right-sizing projects — target oversized instances in specific regions without restructuring your Cost Layer taxonomy
- Cross-cutting optimizations — apply a single Initiative across multiple Cost Layers where the same resource type exists
Usage Type is an AWS-specific billing dimension with no direct GCP equivalent — for GCP resources, use Service, Resource Family, and Instance Type to scope your filter instead.
t3.large in eu-west-1 → targets only those specific RDS instances within Production, leaving all other Production resources and other environments unaffected.
Example (GCP): Non-Production Cost Layer + Resource mapping for Compute Engine e2-standard-4 in europe-west1 → targets only those specific Compute Engine instances within Non-Production, leaving everything else unaffected.
Resource filter values are drawn from your actual cloud cost data — AWS, GCP, or both, depending on which integrations you’ve connected. The picker shows only values present in your imported cost history, sorted by spend impact (highest first).
Creating a Resource-Based Initiative
1
Create the Initiative
Navigate to Initiatives and click + New Initiative. Provide a descriptive name, select the Type (Absolute or Percentage), and check Permanent Change if the effect should persist after the active period ends. Choose a color to identify the Initiative in charts, then click Create Initiative. The remaining steps are completed by editing the newly created Initiative row. To edit or delete an Initiative at any time, click the three-dot menu on its row and select Edit or Delete.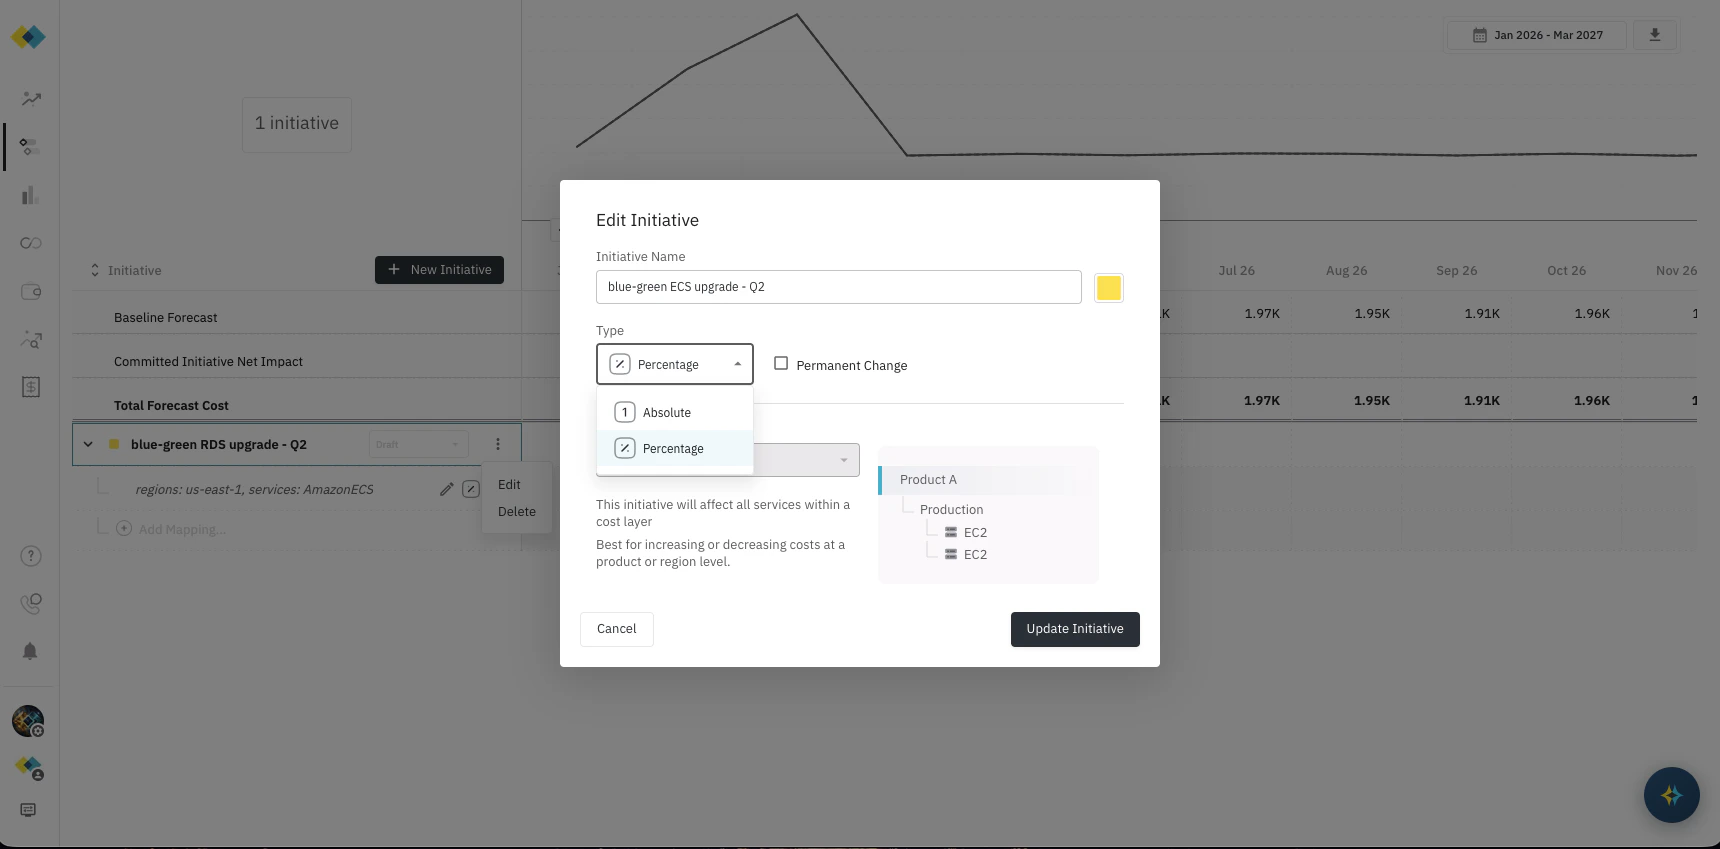
2
Add a Resource Mapping
Click Add Mapping on the Initiative row and select Resource. Use the dimension picker to build your filter — choose the dimensions relevant to your project (service, region, instance type, etc.) and select the applicable values. Add multiple conditions as needed; all conditions are combined with AND logic.
3
Optionally add a Cost Layer Mapping
If you want to limit the Initiative to a specific Cost Layer, click Add Mapping again and select Cost Layer. Combined with your Resource mapping, this scopes the Initiative to matching resources within that Cost Layer only.
4
Set monthly impact values
Enter the impact value for each Billing Period in the Initiative’s active months. If you chose Percentage, enter a number representing the percentage change — for example, 30 to add 30%, or −30 to reduce by 30%. The application will automatically apply that percentage to the actual spend matching your mapping filter and calculate the dollar impact for you — no manual calculation needed. If you chose Absolute, enter a positive or negative dollar amount — for example, 5000 to add $5,000, or −5000 to reduce by $5,000.
5
Set status to Committed
Mark the Initiative as Committed to include it in your forecast. The forecast will immediately reflect the projected impact.
Examples
Any planned change with an impact on your cloud costs can be represented as an Initiative:Example Walkthrough: RDS PostgreSQL Migration off t3.large
The following example shows how to model a phased migration of RDS PostgreSQL instances away fromt3.large in the eu-west-1 region, where each month another quarter of the instances are replaced until the migration is complete. The same walkthrough applies equally to a GCP migration (e.g., moving off a Compute Engine or Cloud SQL instance type) — only the Resource Mapping values in Step 2 would change.
Scenario: Your engineering team is migrating Production RDS PostgreSQL workloads in EU West 1 off t3.large instances over four months (May through August 2026). Each month roughly another quarter of the instances are migrated to more cost-effective alternatives, so the cost reduction accumulates month by month until fully complete.
Step 1 — Create the Initiative
Click + New Initiative and fill in the following:Step 2 — Add a Resource Mapping
Click Add Mapping and select Resource. Configure the following dimensions to scope the Initiative to the affected infrastructure:Step 3 — Add a Cost Layer Mapping
Click Add Mapping and select Cost Layer, then choose Production. This ensures the Initiative applies only to Production RDS costs — Non-Production and other environments are unaffected.Step 4 — Set Monthly Impact Values
Each month represents cumulative migration progress. By August, all targetedt3.large instances have been replaced and their spend is fully eliminated:
Because Permanent Change is checked, the −100% reduction from August carries forward indefinitely in the forecast, reflecting that the migration is a lasting infrastructure change.
Step 5 — Set Status to Committed
Mark the Initiative as Committed. Your forecast will now show the progressive reduction in Production RDS costs ineu-west-1 across the migration timeline, giving both your engineering and finance teams a shared, data-grounded view of when the savings will materialize.